

News


How to Measure for Right Breast Pump Flange Size?
ure for Right Breast Pump Flange Size?6 minutes3 Things I Wish I Had Known Before Giving Birth About Postpartum Recovery
Pumping can be a stressful process, which is why it's important to ensure that you are using your breast pump properly. One of the most important elements of your breast pump is the flange. If you aren't using the correct size flange, your pumping may be ineffective or potentially even painful and uncomfortable. The following guide will help you understand what a breast pump flange is intended for, why the size of your flange matters, how to tell if it's fitted correctly--and finally, how to measure the correct breast pump flange size for your needs.
What is a breast pump flange?
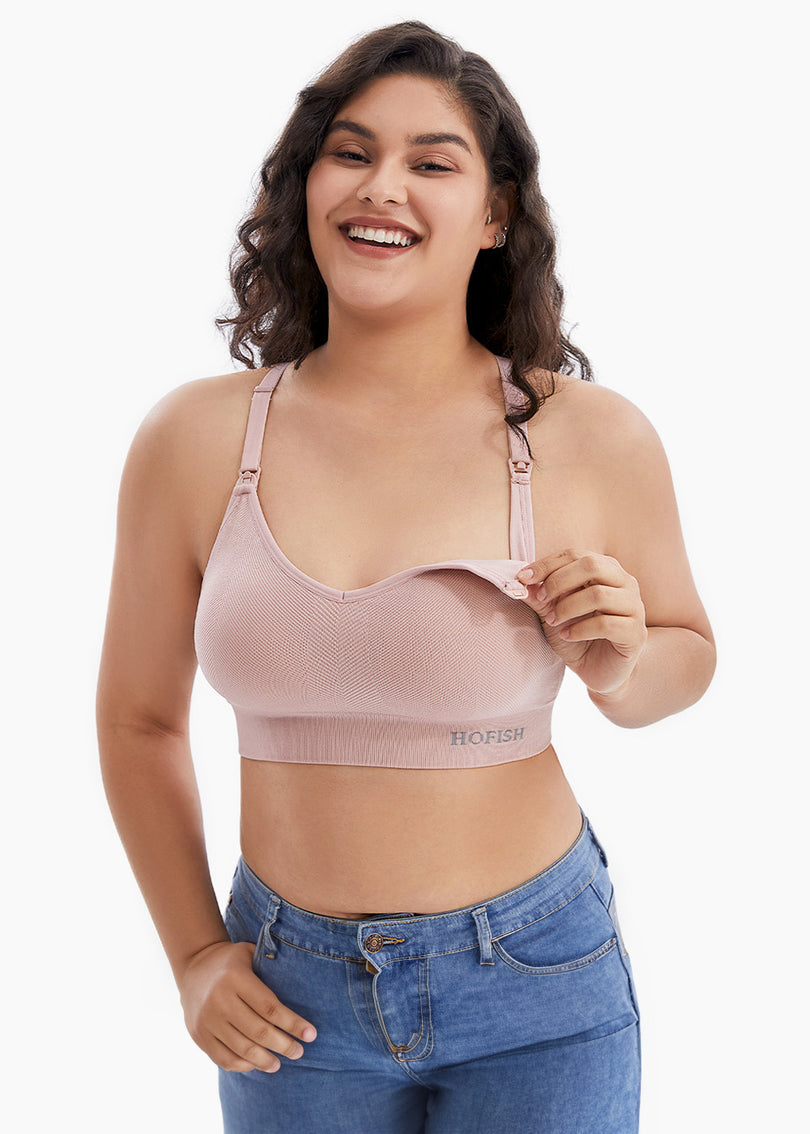
If you've never pumped before or you simply aren't sure how the different parts of the pump work, you might be wondering: what is a flange? In the context of a breast pump, the flange is the piece that connects your breast to the pump itself. Flanges are included with the standard breast pump, but these are "standard" size breast flanges, and they aren't necessarily going to fit every new mother correctly.
Does the flange size actually matter?
Flanges come in a variety of different sizes; they are not "one size fits all." While a breast pump will include flanges in the packaging, these are simply 'standard' flanges that fit the pump. They aren't intended to be custom-sized for every person who buys the pump, because every new mother will have different sized breasts, nipples, and body shapes.
Flange size matters because if the flange doesn't fit correctly, it can cause a host of negative reactions. These range from cuts or abrasions on your nipple to reduced milk flow; reduced milk flow, over time, can cause blocked milk ducts.
The potential negative impact of poorly fitted flanges are why it is so important to make sure your pump flanges are the right size.
How can you tell if the flange fits incorrectly?
You may be uncertain as to whether or not the flange is properly fitted. Here are some of the most common signs that indicate you need to get a different size flange:
Flange rubs against your nipple, causing discomfort or even pain
Significant amount of areolaor even breast tissue being sucked into the flange tunnel
Redness or bruising after you use thebreast pump
Reduced blood circulation in your breast where the flange touches your skin; this is often indicated through your skinor nipples turning lighter where the flange and skin meet
Feeling of fullness remaining in breastdespite pumping for the regular amount of time
Blocked milk ducts despite regular pumping, which indicates that you aren’t getting enough milk out
If you have experienced one or more of the above symptoms, it is very likely that the flange size for your pump is not fitted correctly.
How can you tell if the flange fits correctly?
As a general rule of thumb, if you don’t sense anything wrong and you don’t notice anything unusual after pumping, it is likely that the flange fits properly. However, to make sure, consider the following detailed signs that your flange is likely the correct fit:
Your nipple is "centered" inside the flange piece without touching the sides, and can move freely without being sucked inside
You do not have pain when using the flange
Your areola tissue is not inside the pump
There is no significant discomfort or tenderness after using the pump
You feel "lighter" after using the pump, without feeling like you need to pump more
How do you measure the flange size?
If you have determined that you need a new flange, your next step should be finding out how to measure for the correct flange size. There are 2 ways to measure the size of your nipples.
Use the nipple ruler or the normal ruler to measure
Step 1: Stimulate your nipple to make it perk up.
Step 2: Hold the ruler at a perpendicular angle and line the 0 scale with your nipple base at the same horizontal line, also with the ruler edge meet your areola.
Step 3: Get the millimeters number between the nipple base and the nipple top, and the size measuring is done.
Use the nipple ruler with holes to measure
Step 1: Stimulate your nipple to make it perk up.
Step 2: Place your nipple into the holes one by one to find out which one you can comfortably fit your nipples into, in a way that your nipple can be out through the hole totally, also the ruler can touch the areola at the same time.
Step 3: Get the size of the holes, then the size measuring is done.
After getting the size of your nipples, you can choose the size of flanges, here are flange size guides:
You can get more information about size measurements here.
What are the most common flange sizes?
The “standard” flange size that comes with a standard breast pump is almost always going to measure 24mm. Flange sizes offered individually or with specialty pumps typically range from about 17mm through 27mm.
We currently offer flanges in the following sizes, with various style options for the different measurements on offer:
17mm
19mm
21mm
24mm
27mm
Remember to carefully measure yourself before choosing a flange size. A properly fitted flange will make the experience of pumping not only more comfortable, but more efficient and safer as well.
Final Thoughts
The flange is one of the most important parts of a breast pump. It is important that you have a properly fitted flange in order to reduce the risk of discomfort, pain, and even serious issues like blocked milk ducts. If your flange isn’t the right size, you’ll need to measure yourself in order to determine the proper flange size for your needs.
Remember, if you are experiencing any signs that your breast pump flange isn’t the right fit, take action right away to ensure you get one that’s suited to your nipple size.

3 Things I Wish I Had Known Before Giving Birth About Postpartum Recovery
It’s no secret that giving birth to a baby is tough on the body. However, there are a few things about recovering from giving birth that not many people want to talk about. There are a few things I wish someone had told me about postpartum recovery. I would have been better prepared for what to expect and I wouldn’t have felt so alone in what I was experiencing.
Here are 3 things I wish I had known before giving birth about postpartum recovery.
1. Perineum Recovery Care
If you deliver your baby vaginally, you may experience some trauma to your perineum. According to this article, 9 out of 10 first-time mothers who have a vaginal birth will experience some sort of tear to their perineal area. Don’t worry, most tears or abrasions are small and can heal on their own. There are different types and severity of tears, and it is important to understand how to care for your perineum after your baby is born. I personally had second-degree tears requiring stitches with both of my vaginal births. As a first-time mom, I did not know much about how to care for my perineum postpartum. I was extremely grateful for my wonderful postpartum care nurse at the hospital who took the time to teach me the proper care for tears requiring stitches and gave me tips on how to ensure quick healing.
Here are a few tips to encourage smooth and quick perineum healing. First, going to the bathroom will take extra time. I had a routine every time I went to the bathroom for the first couple of weeks following giving birth! Here is my postpartum perineum care bathroom protocol:
Pee while spraying the area with room temperature-warm water in a peri bottle. This will help reduce any burning, especially if you have stitches. Spray more water after peeing to clean the area since you won’t be able to wipe until the area has healed. Spray the perineal area with a perineal healing spray with natural, anti-inflammatory, and healing properties, then spray the area with a numbing spray if you are experiencing pain or discomfort. Add Witch Hazel pads to a new, clean pad or mesh/disposable underwear to help reduce inflammation, soothe discomfort, and heal your wounds and tears. This protocol will speed up the healing process and make you feel more comfortable during your recovery time.
Second, try doing a sitz bath every day to help encourage healing and offer relief from discomfort. Sitz baths are where you soak your tender parts in a few inches of water rather than submerging your whole body in water. You should ask for approval from your doctor or nurse before you leave the hospital just to make sure sitz baths are safe for you. You can do a sitz bath in your bathtub or use a sitz bath basin placed on your toilet. I preferred using the sitz bath on the toilet because it was easier to sit and stand up. I was very sore after giving birth and the sitz bath gave me immediate relief. I preferred using warm water in my sitz bath but some people prefer cold water so figure out what is comfortable for you. You can also add fragrance-free Epsom salts, essential oils, or herbal sitz bath add-ins for additional healing and pain relief benefits.
2. Breastfeeding is Hard
Although breastfeeding is a natural process your body is designed to do, it does not necessarily come naturally to you or your baby. It is a skill to be learned and practiced. It is easy to feel defeated if you struggle with breastfeeding at the beginning. I want to encourage you that if you persevere and get help when needed, it will get easier and become effortless! Breastfeeding is such a beautiful bonding experience for mama and baby, and the more you prepare, the more likely you are to succeed!
I struggled with breastfeeding as a first-time mom. It was painful, awkward, and uncomfortable. My nipples cracked and bled. I felt like I had no idea what I was doing and I dreaded every time my baby wanted to eat again. I kept thinking to myself, “this should be easy, right? Every other mom seems to be able to breastfeed just fine.” Thankfully, I was able to seek help from the hospital lactation consultant and fellow breastfeeding moms. After a couple of weeks, I was able to breastfeed my baby without pain or anxiety. Don’t be afraid to ask for help and don’t assume it comes easy to everyone.
I would encourage you to take a breastfeeding course while in your third trimester. There are quite a few online options out there to choose from. Also, invest in comfortable nursing bras and breastfeeding essentials from Momcozy. Being prepared can help set you up for breastfeeding success!
If your breastfeeding journey comes to an end sooner than you imagined, it’s okay and you are not alone. The ability to breastfeed or the length of your breastfeeding journey does not define your worth as a mother. You will figure out what works best for you and your family!
3. Nights Can Feel Lonely
While pregnant, you probably got some comment from a friend or even a stranger at the grocery store, “sleep now because you’ll never sleep again!” I don’t know about you but I always felt like those types of comments were far from helpful. It’s true that you will most likely struggle to feel adequately rested every day and you will have to wake up throughout the night with your baby. I wish people would instead offer practical advice, experiences, or encouragement. The first few weeks of nights with your newborn can feel really lonely. It can feel like you are the only person awake in the middle of the night as you try to rock your sweet new baby back to sleep. When my babies were newborns, I would dread the nighttime. I would start to feel anxious and a pit would form in my stomach. It wasn’t until my babies were older that I read someone compares the feeling to homesickness and to me, that’s exactly what it felt like.
My advice to new parents would be to share these feelings with their partner. At first, I would feel bad waking my husband up in the middle of the night because I felt like it wasn’t necessary. My baby just wanted to nurse and go back to sleep but I couldn’t help but feel lonely and wonder how long I’d be able to sleep until the next time my baby woke up. Once I shared my feelings of loneliness about the night wakings, my husband would wake up with me and sit with me as I fed our baby so I didn’t feel so alone.
I would also recommend connecting with other moms who also have newborns. Chances are your mom friends will also be waking up in the middle of the night to care for their baby. With my second baby, I had a couple of mom friends who also had newborns and we would text each other in the middle of the night just to check in with each other or send an encouraging message. This was extremely helpful for my mental health. Knowing there were other moms experiencing the same things as me made the nights feel much less lonely.
If you are a new parent about to give birth, I hope this information doesn’t scare you but rather prepares you for what is to come. With more education, you will feel better prepared and equipped to handle these things, and most importantly, you will know you are not alone in your postpartum recovery journey. We are here for you and cheering you on. You’ve got this, mama!

Nipple Type and Breastfeeding: Can I Breastfeed with Flat or Inverted Nipples?
Every parent planning to breastfeed hopes that their baby will be born and immediately latch to the breast and feed without any complications or challenges. But that’s not always the case. Breastfeeding is a learning experience for both mother and baby, even if it’s not a mother’s first baby, because every baby and every experience is different. One of the many challenges people may find with breastfeeding is their nipple shape and how well their baby is able to latch and suckle. People with flat or inverted nipples may find the learning process a bit difficult for themselves and getting their baby to latch on and maintain a strong latch to suckle. But the good news is that breastfeeding is possible for all nipple shapes and sizes. If you have flat or inverted nipples, this article will discuss tips and information on ways to successfully breastfeed.
Are my nipples flat or inverted?
You can check your nipples to see if they are flat or inverted by placing your thumb and forefinger on each side of your areola (the darker skin around the nipple) and gently squeezing. Flat and inverted nipples retract into the breast tissue instead of stiffening and protruding outwards.
Ways you can make breastfeeding work with flat or inverted nipples
Nipple stimulation usually causes the nipple to become stiffer and protrude—even flat and inverted nipples. There are several ways you can stimulate your nipples to draw the nipple out of the areola to help your baby latch on and maintain their latch. Oftentimes, after several days or weeks of breastfeeding or using a breast pump, flat or inverted nipples may evert naturally.
It is important to note that if you are pregnant and want to use nipple stimulation to prepare your nipples for breastfeeding, you should wait until you are 37 weeks or more because nipple stimulation can cause contractions.
Nipple Stimulation
Manual nipple stimulation is simple and effective to help draw out flat nipples. You can do this by gently pinching your nipple between your thumb and finger or using a cold, damp cloth to gently wipe over the nipples.
Another stimulation method you can try is called the Hoffman technique. This technique has been found to effectively improve inverted nipples and the quality of breastfeeding. Perform the Hoffman technique by:
Placing your thumbs on each side of your nipple. Be sure to start at the base of the nipple and not the edge of the areola.
Press your thumbs firmly into the areola.
While pressing, pull your thumbs away from each other.
Repeat for five pulls.
Move your thumbs into different positions around the nipple and repeat.
Hand Expression
Sometimes the nipples can become firm and flat and difficult for the baby to effectively latch because the breast becomes engorged with milk. You can help soften your nipple and make it more everted by hand expressing just enough milk to soften the breast and nipple. Follow these steps to hand express:
Cup your breast with one hand and with your other hand, make a “C” shape with your thumb and forefinger just outside the areola.
Gently squeeze and release with a rhythmic pressure until you see drops of milk begin to flow.
Using a Warming and Vibration Lactation Massagercan help achieve a quicker, more effective letdown of milk.
Using a breast pump
Breast pumps are great devices to create rhythmic suction to encourage the nipples to protrude. For very deeply inverted nipples, breast pumps can be especially helpful to draw out the nipples.
Pumping can be made easy, convenient, efficient, and discreet with our wearable, hands-free breast pumps. The S9 Pro Wearable Breast Pump is a hospital grade pump with quiet operation and long-lasting battery life.
The S12 Pro Wearable Breast Pump is a high efficiency hospital grade pump with a double-sealed, soft silicone flange design that helps pump comfortably and highly efficiently.
Alternative suction devices
There are several aiding tools on the market to assist with breastfeeding for people with flat and inverted nipples that use suction to evert the nipples. Some of these products include:
Nipple correctors: These are small, silicone cups that can be manual or battery operated. Manual correctors work by squeezing the silicone cup and applying it over the nipple, creating negative pressure to pull the nipple outward.
Latch assists: These work much like nipple correctors, but the suction cup has a suction bulb attached to it. The bulb can be squeezed to apply a comfortable amount of pressure rhythmically.
Pulling devices: These devices are tube-like with a plunger on one end. Apply the open end over the nipple and use vacuum suction from the plunger on the other end to draw out the nipple.
Breast shells: These are small, plastic and silicone shells that you place over the nipple and are held in place with your bra. They apply a consistent pressure that help to gradually evert the nipple.
Nipple shields
Nipple shields are soft, flexible silicone shields shaped like a nipple that is placed over the flat or inverted nipple and areola to encourage and help the baby achieve an effective latch. There is, however, evidence for concern that nipple shields may reduce the transfer of milk and interfere with the breast being completely emptied. Babies may also become dependent on using a nipple shield and prefer it over nursing on the natural breast. If you are considering using a nipple shield, it is recommended to speak with a lactation consultant to determine if it is the best option for you and your baby.
Contact a lactation consultant
Lactation consultants can be invaluable sources of knowledge, advice, and help for guiding you and your baby on your breastfeeding journey. They are trained in lactation-specific education and acquire several hundred hours in clinical lactation experience.